Search This Blog

Showing posts with label miniature accessories. Show all posts

Monday, 8 November 2010

Welcome to Mrs Harvey's

At long last, a promise I made on this blog several months ago has finally come to pass!  As explained in my previous posting, I'm busy doing a photography course at the moment (in between everything else!) in the hope that my doll photography will improve. Today I felt suitably confident to try photographing my elder daughter's dollshouse and contents, which I've been wanting to do for ages, but after taking some really awful photos of my Triang last year, I was very aware of my shortcomings with a camera and miniatures.

Welcome to every child's dream shop - Mrs Harvey's cakes and toys.  Mrs Harvey lives above the shop, and does a lot of her own baking.  She has two grandchildren who often come to visit her (hence the train set in her sitting/bedroom), and today they are downstairs watching two other children choose some cakes.


My husband built this house from a kit soon after our younger daughter was born, for our elder girl, who was 7 1/2 when her sister arrived.  He did a beautiful job of hiding the lighting wiring in grooves, so there are no ridges in the wall or ceiling papers, the switches are on the back of the house behind the staircase.  I did the painting and decorating and painstakingly sanded and laid the floor tiles in the shop (next time it will be squared paper, not real tiles!).  I also rebuilt the shelving unit in the shop which was bought ready built but needed to be adjusted to fit the space under the stairs, and I'm quite pleased with the result.

My daughter and I had great fun finding miniature toys at various fairs we attended, and we made most of the cakes from fimo including the hot cross buns which have real poppy seeds for the raisins.  Mrs Harvey and her grandchildren are all Heidi Ott dolls, which came without clothes, and I dressed them (even doing smocking on the little girl's dress, and knitting the jumper worn by the boy).  The two visiting children were gifts from my godmother and I haven't changed their clothes, even though they seem a little old fashioned in their attire compared to the others (the kitchen is fairly modern, so we think this shop is probably quite recent, despite some old fashioned toys).

 Mrs Harvey's bed sitting room in the attic


The gaily woven rug which my daughter made on a toy loom

 The kitchen area

 Baking

 Mrs's Harvey has 2 dogs
The dresser, including the mini tea set
with mouse on the teapot made by Fay of Cape Town

 The middle floor
The cake and toy shop
Mrs Harvey's Grandchildren

 Dog on the stairs

 Customers for cakes

Toys

 Cake Shop window from inside

 Toy shop window

 Shop windows from outside

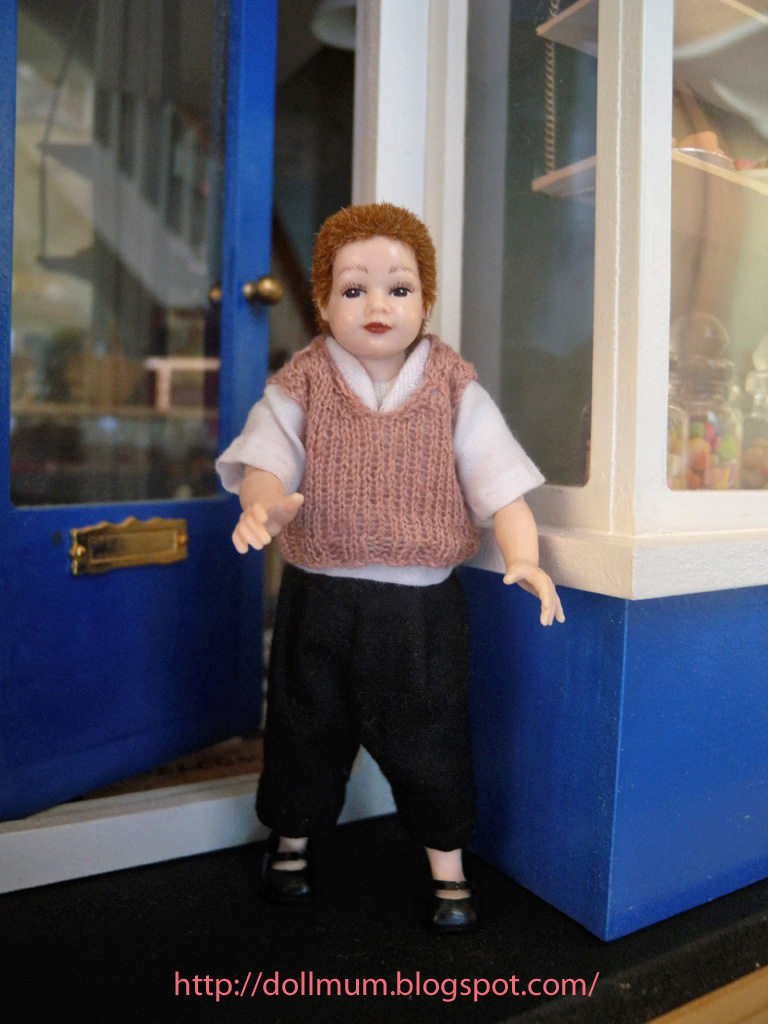
Mrs Harvey's grandchildren outside the shop

They have now all been packed away carefully in a plastic box, as we are hoping that we'll be moving house soon (though you never can tell with these things).  It is quite sad seeing the dolls house empty and knowing that it is likely to stay that way for the next couple of months while we move and get settled in our new home before we can bring all the dolls houses out and set them up again.

Tuesday, 13 July 2010

Sewing again

As explained in my previous post, this time of year in our family is always very busy.  However the birthdays are over now, as are my daughter's music exams and I've at last managed to carve out a few evenings to start working on dolls clothes again.  I keep wanting to get the dollshouse on the go but get distracted by outfits for 50cm dolls instead!  The new Gotz catalogue is out, and my elder girl is particularly taken with 'Hannah the Rockstar' - she loves her outfit even though it is a deep rich pink (not my red head's favourite colour).  The outfit doesn't come separately, Gotz are clever at attracting people to buying more dolls, but as we've already got an extensive family of Gotz, Australian Girl and Euro girl dolls, I don't want to buy another blond Sarah/Hannah doll.  So I've decided to try and copy the outfit, though with different material.

I've got as far as sketching out the pattern based on a Joan Hind pattern for an A-line dress, though adapted to suit the pleats in the rockstar dress, and have just cut out the material, so am almost ready to start sewing.  I have also bought a real guitar (black plastic) which is very similar to the guitar that Hannah is holding (ebay again), it even has its own padded case.  Some months ago I bought some tartan plimsols which go with the two different materials I'm using for this dress.  All of this planning, material matching and considering is happening while my younger girl sleeps upstairs and my elder girl is away for a few days on a school trip, so neither of them know.

I'll post more as the dress progresses.  In the meantime, welcome 'all4dolls' to my blog.

Saturday, 6 February 2010

Evacuees

I mentioned some weeks ago that we had collected some items from the storage so that I could spend a weekend making miniatures.  One of the items we brought home that day was the roombox.  It seems appropriate to talk about it now, as we are almost upon the 6th anniversary of constructing this little scene.

I was about to give birth to our second daughter, and we had just bought the kit of the dollshouse that is now my elder daughter's dollshouse.  We were very conscious of the fact that she had been an only child for over 7 years, and that adjusting to a new sibling was going to be difficult.  So for Christmas we had bought her a doll's pushchair and her Godmother gave her the baby doll Thomas.  These had gone down well.  However at school that term her class was exploring WW2 from the perspective of children - what it felt like to be an evacuee, dig for victory and live during those times.  Her class were making and drawing things to illustrate their understanding of the topic.  I wanted to explore it further with her, so we bought a roombox kit  (dollshouse emporium), my husband put it together for us, and we collected items together, including buying two cheap dollshouse emporium dolls which I redressed, and sundry other items including a pet food can!

The internet was a great source of information for things like how to construct an Anderson shelter and learn about rationing, especially the BBC schools website.  She and I came up with the idea of two evacuees arriving in an English country village with their gas masks and their few belongings, to a world of fresh vegetables on your doorstep and sheep in the fields nearby.  I sketched out the background scenery and my daughter coloured it all in and drew the sheep.

My younger daughter arrived (nearly 2 weeks late), then a few days later it was February half term!  Any sensible mother would have postponed further work on the room box.  Not me (well now at least I've admitted I'm not sensible!).  My abiding memory of constructing the room box is sitting at the dining room table with the baby wrapped up in the Kari-me cloth sling, lumps of Fimo and tools, rolling miniature tomatoes, cauliflowers and carrots on a board on the table with my elder daughter.  I was doing it one handed until I had the sling! (I've still got the sling, I will not part with it - for my children's children, if I'm lucky).  I was very tired from disturbed nights and trying to keep everyone happy and this was my way of spending time with my elder daughter so she wouldn't feel left out.

The path is sand on glue, the vegetable plot is tea leaves and sand on glue! We were very proud of  the Anderson shelter - my daughter had a ripple cardboard kit used for giving ordinary paper or card a ripple effect.  The main body of the shelter is the pet food can, cut open and trimmed to size, the front and back of the shelter is rippled card coloured with a pencil to make it look like corrogated iron.

The tomato plants are made from coloured wire and green card (my first attempt at making miniature plants).  The carrots were the best fun for my daughter to make, and we trimmed the tops with bits from my miniature Christmas tree.

Arriving in the country
Showing the background scenery
Approaching the front door
Close up of the garden
 
Anderson Shelter
 
Gas mask and child label on her coat
I made their coats from a pattern from Sue Atkinson's 'Making and dressing dolls house dolls'

Monday, 30 November 2009

Painting the teddy

It has been such a busy week since my previous update, and I've had little time for miniatures (though have been reading other blogs late at night when I should really go to bed!).  However I had left the paints out from last weekend's efforts because there was one white metal miniature from the toy set that needed some additional preparation work before I could paint it.  The jointed teddy came with only 3 of his 4 pins as one had broken off, and I wasn't willing to trust white metal cast pins anyway.  So my husband chopped them off and drilled holes through his body and suggested fuse wire would be the best material for adding on his jointed legs so they can still move.  He found an ancient card of three different thicknesses of fuse wire, and I chose the middle thickness, so he drilled the holes accordingly.  I am a dab hand with the pillar drill, but as he was available, I asked him to do the drilling.

To paint the bear I threaded the four limbs onto a bent out paperclip I had been using to stir the Humbrol paint, and threaded the body onto the fuse wire.  This way I didn't have the problem of trying to hold a tiny bear and paint him, so my fingers didn't get quite so messy, and it also meant he could dry without touching anything and smearing the paint.

The photos show that the bear is still work in progress, as I've really only given him 2 coats of yellow paint, and want to follow this up with brown detail for the fur and his features, but have had such a busy weekend with church fundraising activities and taking the girls skating, so teddy has to wait until I can spare a little time one weekday evening.

Teddy's painted body on the fuse wire (still on its card) so he could dry


Teddy's limbs on the paperclip propped up by a screwdriver resting on the tin

Monday, 23 November 2009

Results from a weekend of miniatures

It was lovely making miniatures again this weekend. Sunday afternoon my daughter and I dashed into Hobbycraft (always a risky business going in there because there is so much variety of craftware to buy) and bought some Humbrol Enamel paints.

My girl wanted to paint the figures as well, so I gave her the challenge of the little doll's dress whilst I continued working on the Cuckoo clock. In my previous posting I uploaded a photo of the work in progress - the clock needed more colour but not too much as I didn't want it to look too bright or tacky. I printed out photos from the web of 6 different but colourful clocks to give me a guide on colour balance. None of them were anything like the same design, but they did help.

I made a start on the clown in between coats of paint drying on the clock and cooking Roast Lamb for dinner. My daughter did a pretty good job of the doll's dress and her face skin painting but then had other things to do (like getting ready for school for Monday). So I eventually finished the girl, including painting her features which I did at the same time as the clown's face.


Front view of the doll (white metal Phoenix Model)


Back view of the painted doll 


The finished clown 

I also glued the fire iron stand base and top to the upright, touched up paint a bit and the set was complete.

The fire iron set

This evening, after work and choir practice I have fitted the weights, chain and pendulum on the clock, so my daughter will get a surprise in the morning.

The finished clown and Cuckoo Clock 


Close up of the Clock

Saturday, 21 November 2009

An afternoon of miniatures

It is a long time since I've been able to create anything really miniatures-related, as so much of my creative time recently has been concentrated on making clothes for play dolls and a baby's quilt.  Additionally, since July my Westville Greenleaf dollshouse has been in storage while we had our house on the market for a while, so my miniatures are out of reach.  Fortunately however my elder daughter's 3 storey shop is still very much accessible at home and today I got a chance to play with it!

We collected a few things from storage this morning, including a few of my tools (just in case), though in fact so far I haven't needed to use them.  More about what we collected in another posting this week.  After lunch we cleared the kitchen table (actually a breakfast bar, a good height for working at because you can stand or sit without breaking your back) and got the much used cutting mat out.  At Miniatura about 18 months ago we had bought some cut-out your own board games and my daughter set to work with a scalpel and ruler after I showed her what to do.  She got a bit confused at one point with the folding and gluing corner tabs instructions (the diagram was good for someone who had done these things before, but not so clear for a beginner) but ultimately did a very good job of the two boxes.

 
 My daughter cutting out miniature boxes


Miniature Snakes & Ladders

Her two boxes of games, with a 50 pence piece

Whilst she was cutting and gluing, I borrowed my husband's humbrol enamel paints and painted the fire iron set and the cuckoo clock white metal kits from Phoenix Models.  I had made up one of their cooking range kits in the past, so it was familiar territory for me.  This was a cheap way of providing her with a set of fireplace accessories which, if made by a professional miniaturist using the proper materials, would have been 10 times as expensive, so although the bronze paint isn't really like the real thing, it is okay.  We had looked at cheap ready made sets, but none of them looked authentic enough, whereas the Phoenix Models look right if painted correctly.

I needed my set of needle files to tidy up the metal on the clock before painting, but fortunately these were easily to hand in my husband's small workshop.  The cuckoo clock is still work in progress, my husband's collection of paints are for his aeroplane models, and I need some brigher colours to finish it off, especially as we've got a Phoenix Model set of toys to paint, so I think a trip to Hobbycraft tomorrow is a must.


Work in progress on the fire iron set

 
Painting work in progress on the cuckoo clock

For a while this evening we dusted and tidied the dollshouse starting with the attic bedroom, working down to the kitchen followed by the shop on the ground floor.  However the shop part isn't yet completely tidy, as we want to make some Christmas boxes and bags from the latest issue of Dollshouse and Miniature Scene, and a container is required for those skittles...

Hopefully we'll get some more mini making done tomorrow.  The weather is awful at the moment, so spending time indoors making things is one good way to pass the weekend.