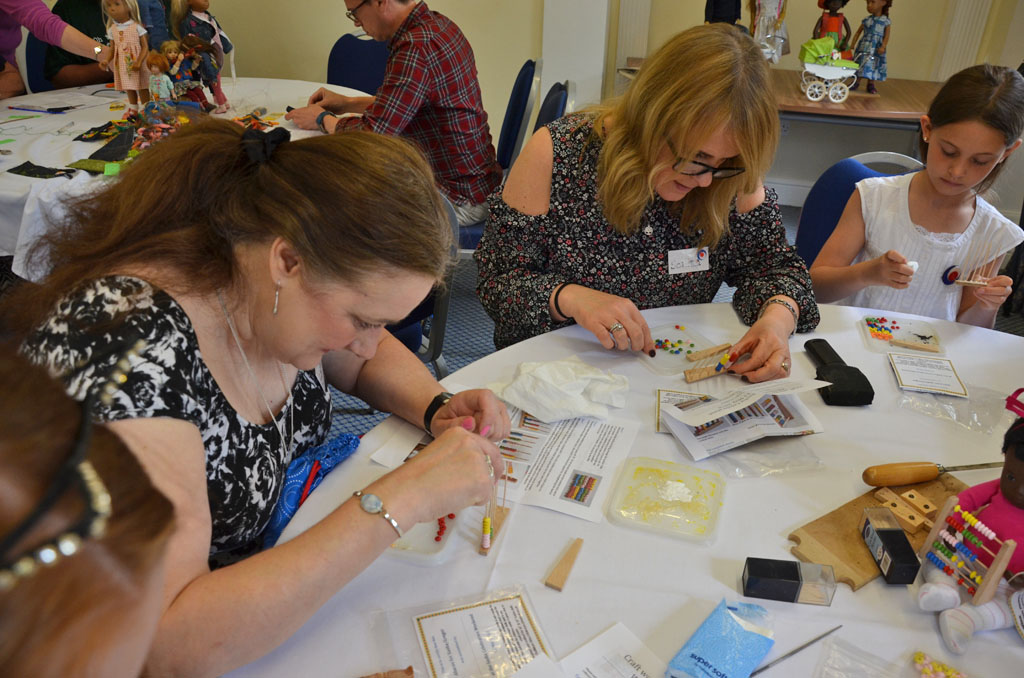
Every year at the Sasha Celebration Weekend (SCW) in Nottingham I have given a craft workshop on the Saturday morning alongside several others teaching a craft of some kind. Mine have always been wooden toys for Sasha and Gregor dolls -
2015 was a miniature train engine,
2016 was a marionette bird,
2017 was a push-along duck and this year a counting toy - a traditional abacus.
I had thought of making an abacus a couple of years ago, then my younger daughter suggested it specifically for the SCW in 2018. As always the challenge is to design something which would be relatively straightforward for people to make and appealing without the planning and preparation of 50 kits driving me insane with lots of parts to prepare. So although some toys would be wonderful (such as the
little wooden horse I made as part of my donation to the Children's fund auction at the 2017 Sasha Festival in the USA), it would be tedious to mass produce all the parts when there are lots of elements and processes before the kits can be bagged up with instructions for assembly.
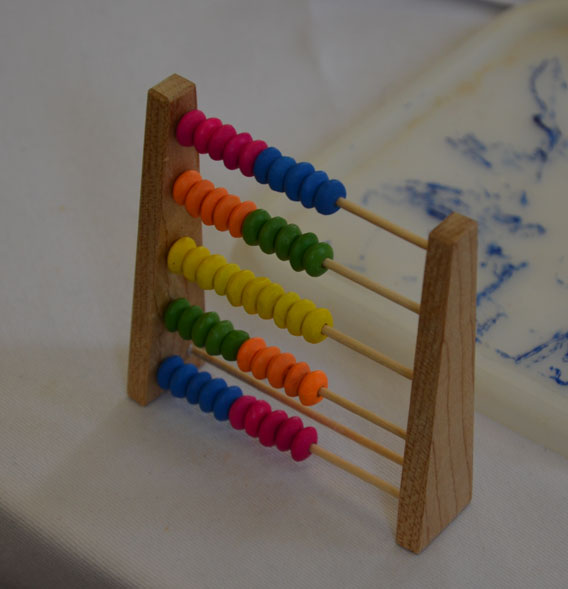
I used as inspiration the abacus my children played with when they were small - a simple wooden frame with coloured beads mounted on 10 thick wires. On a very small scale my early sketches and experiments with beads proved that a 10 row abacus would be impractical - I found some 5 row examples in pictures online and they
are very effective. At first I considered using wires but then decided that cutting and filing the sharp edges for 250+ wires would be incredibly time consuming, so I decided to use cocktail sticks instead. This immediately limited the size of the abacus to, as it turned out, pretty much the right scale for the dolls (because of the length of cocktail sticks, trimmed slightly to remove the sharp points).
I needed beads which would fit 10 in a row on a cocktail stick yet allow movement for counting, so discovered in my measurements that round ball beads would not fit, they needed to be round flat beads (I had some from another craft project, but not nearly enough). So I purchased packets of mixed coloured flat round wooden beads - I needed 2,500 but had to buy more because some beads had clogged holes or had been misshapen or broken in manufacture, and some colours (especially yellow) I needed more of than others. The packets had 7 different colours, I used 5 colours in each kit, in different combinations.
 |
| The original abacus and the various combinations of bead colours for the miniature versions |
Then came the tedious business of filing out the holes of 2,500 beads - many of the beads had partially clogged holes (burrs of wood filled with the paint) so didn't slide easily on the cocktail sticks. Years ago, as a young apprentice, I had bought a set of metal needle files as part of my toolkit and the fine round needle file was put to good use as I gradually filed and sorted the beads into colours. This was a good job to do while watching DVDs or TV with the family when sitting at my computer desk (I tend to multi-task), I did them in small batches as gripping the small beads (which have edges unlike perfectly round beads) and the needle file eventually hardened the skin on my fingers and thumbs.
 |
| Filing out the holes in the beads using a needle file |
My husband was a star - he did the wood cutting for the side pieces for each abacus. I had designed the sides to be tapered like the full size example, which meant that it wasn't just strips of rectangular wood, but an angle on each piece! He had lots of old maple floor boards in his wood stock so cut up a piece into strips then cut the strips into the right lengths, then set up an angle piece jig on his saw to cut the strips at an angle into a pair for each abacus. He makes me nervous as he doesn't use a saw guard (he hasn't cut off any fingers yet as he is extremely careful but that doesn't stop me being anxious about it). I still have vivid memories of visiting my father's workplace as a child, going into the big shop-fitting workshop with lots of power tools and seeing some workmen who previously had saw accidents, damaging their hands.
 |
| Sawing the abacus side pieces - cutting the angle to make pairs |
Once all the pairs of wood were ready, I set up a jig for drilling the holes in the right positions. It would have been very time consuming to measure them out individually, so I drilled one piece with holes all the way through and this was used as a guide piece in a jig (2 pieces of wood screwed to a base at the correct angle to grip the abacus pieces). I put the piece to be drilled into the jig with the drilled out piece above it, all lined up, then drilled through both, though with the drill set to the right height so that the holes did not go all the way through the abacus side. The other abacus side piece was drilled as a mirror of the first side. I like drilling holes, which is just as well because for each side piece there were 6 holes (5 for the bead rows and one for the support bar) which totalled 600 holes for the 50 kits (in practice it was more than 600 because the dog chewed a few of the pieces and my husband had to make more!).
 |
| Drilling holes in the abacus side pieces |
 |
| Abacus side pieces waiting to be drilled |
 |
| Drilling through the guide piece into an abacus side piece beneath the guide, wedged between the jig pieces |
 |
| Drilled pieces in pairs |
All the pieces were sanded to remove saw marks (he hadn't planed the wood smooth) and the cocktail sticks had their tips removed (I used a chisel on a woodblock) - six cocktail sticks were needed for each abacus (300).
 |
| Trimming the cocktail sticks and the trimmed sticks laid out on a sheet of paper |
Then all the beads, cocktail sticks and side pieces were sorted into bags, along with the printed instructions, which I prepared once I had made up the prototype abacus and photographed each stage of assembly.
 |
| Kit of parts to make the miniature abacus |
 |
| A bead layout for 5 rows, mixing up the colours a bit |
 |
| Gluing the trimmed cocktail sticks into the holes on one side piece |
 |
| Cocktail sticks ready for threading the beads |
 |
| Beads threaded onto the cocktail sticks |
 |
| Blobs of glue on the end of the cocktail sticks, ready for the other side piece to be fitted |
 |
| The second side piece is glued onto the cocktail sticks |
 |
| Excess glue wiped off, the completed abacus |
 |
| Allowing the glue to dry with the beads clear of the sides |
As a Sasha friend (also making up kits for SCW) said to me when she guessed what I was making for the SCW craft kits: "as a friend I would like to inform you that you are BONKERS! but maybe you knew that already!"
 |
| Baby Nina plays with her new abacus while sitting in the chair from 2017 SCW |


.JPG)


.jpeg)


.jpg)


